Our Location
Brugata 1
0186 Oslo
Norway
Reflash has recently undergone a pretty large change. It has become faster and more secure by changing from using a software “switch” to a hardware “key” to access a higher security level.
This blog post will give a written account of what the video shows. TL;DR watch the video.
Recore comes with software pre-installed. For Recore A7 that has been MainSail as the top level software that the user interacts with. some users have requested OctoPrint and Fluidd instead as alternatives, so we offer those user interfaces as well for those who want them. If you want to go from one software to another, it can be a good idea to do a clean install, meaning you wipe the eMMC completely.
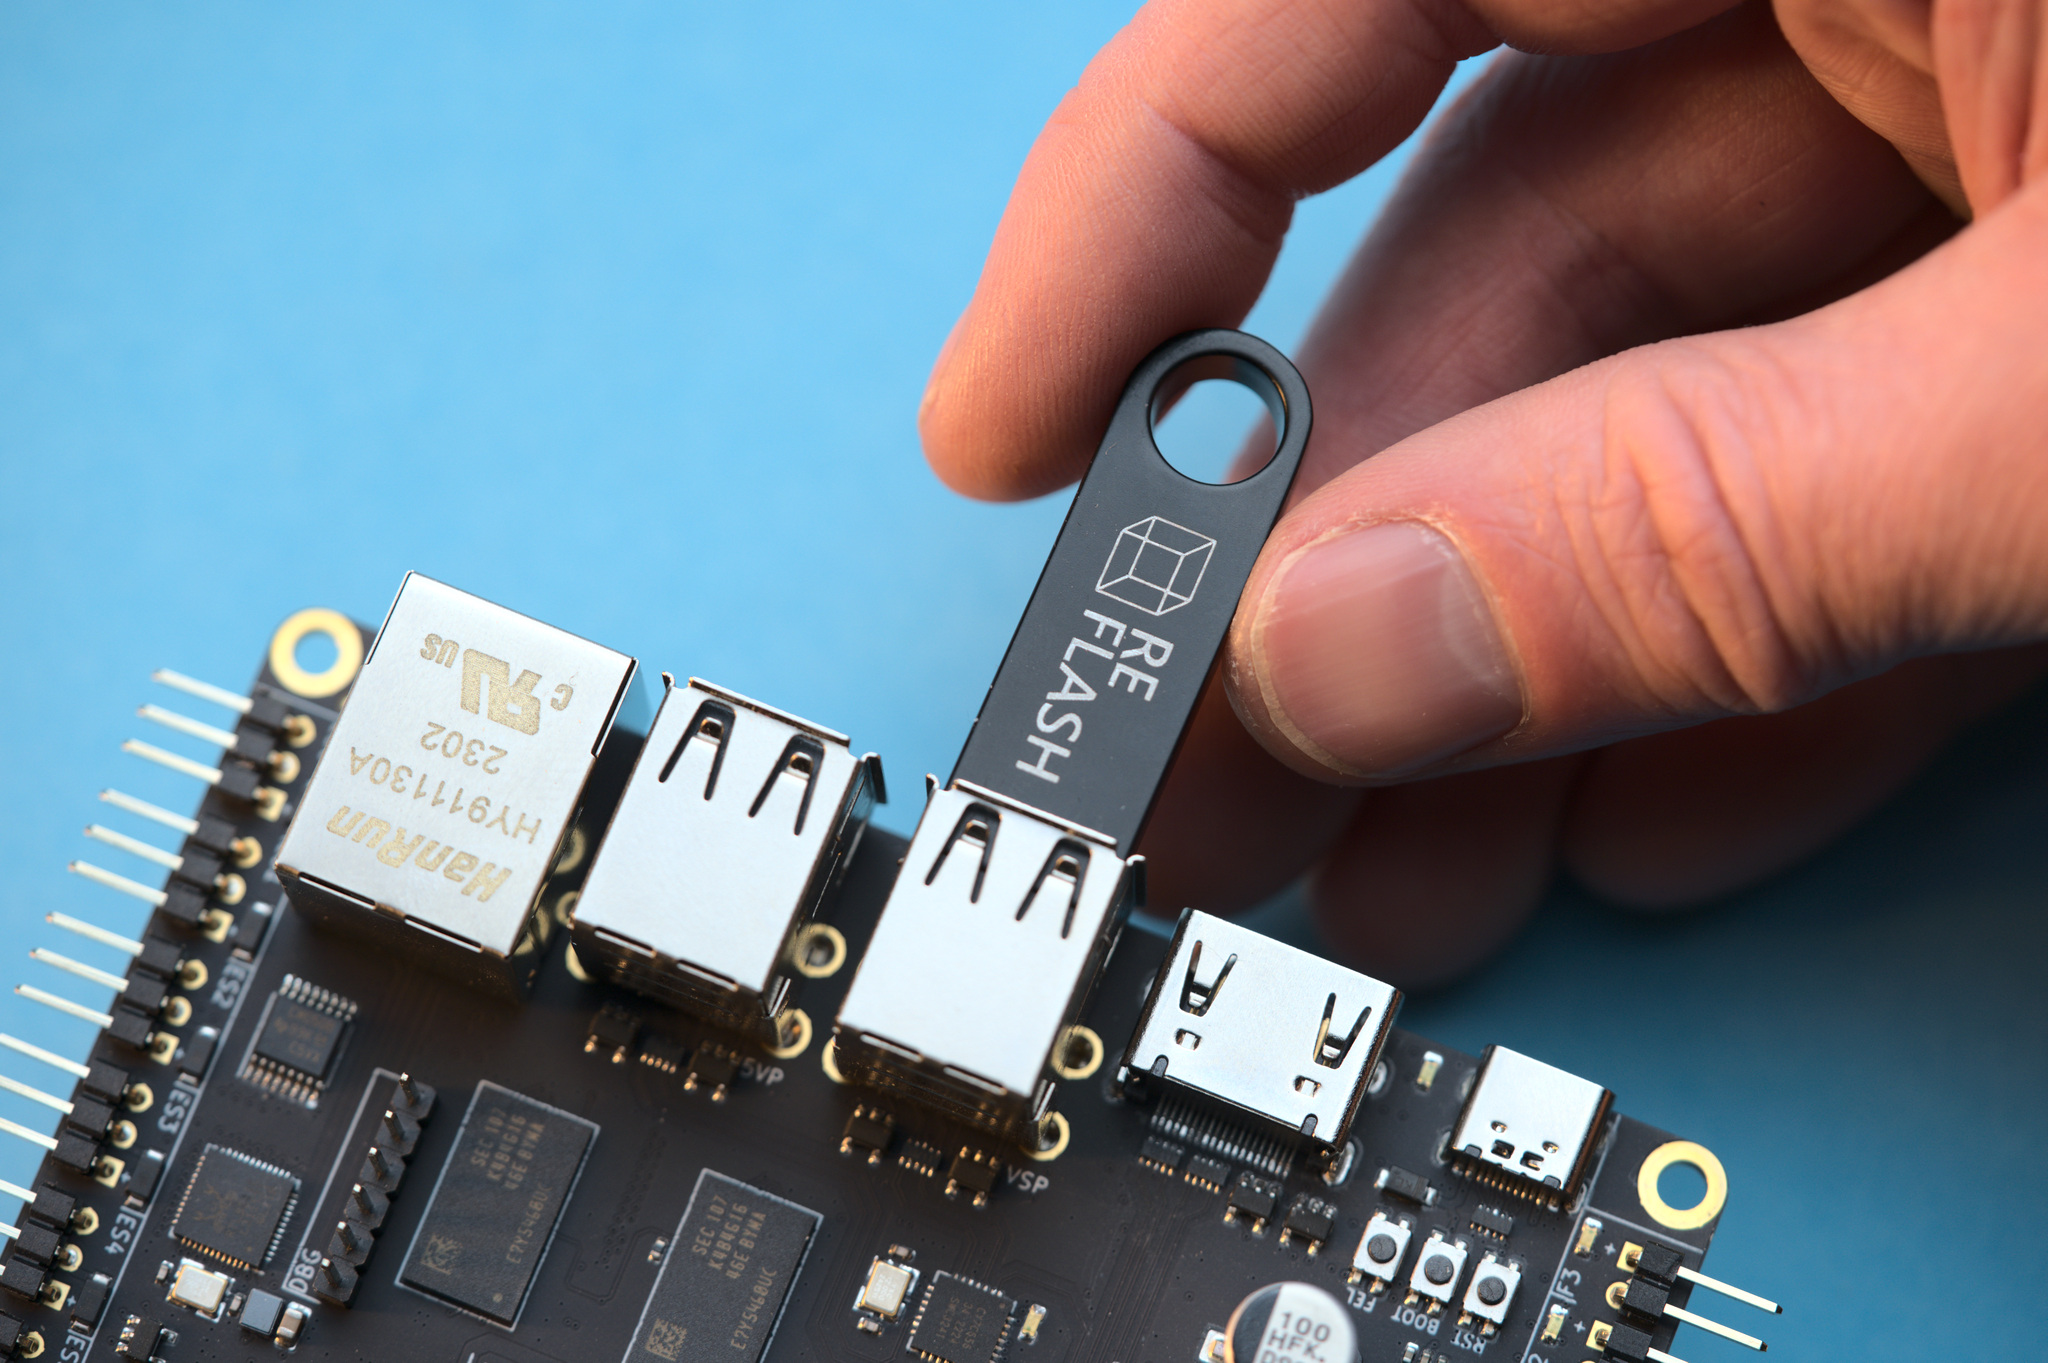
Because Recore has eMMC instead of MMC, that process looks a little different from those platforms that use MMC. The solution that has been chosen is to to use a USB drive as an intermediary and run the board from that instead of from the eMMC in order to completely wipe the eMMC and install fresh software. The image that runs on the USB drive is called Reflash and it is a simple webserver that allows you to download new software and flash it on to the board.
The new way to get back to Reflash, once you have made the conversion, will be to physically insert a USB drive with Reflash in one of the USB host ports. During booting, u-boot will scan the ports looking for a suitable image. If one is found, the boot process is continued using the Linux image on the USB drive. Since the the distro on the USB drive is created as an InitRD, there is no danger of ending up with a corrupt filesystem as a result of removing the drive after a flashing operation has finished. As always, all software is open source, so the underlying script for creating Reflash can be looked at for inspiration and profit.
It’s worth noting that in order to start using this new regime, it is necessary to set Recore into FEL-mode. This is done by holding down the FEL-button while pressing the RST-button on the board. It means that you need physical access to the board. It is also necessary to connect the board up to a host computer using a USB-C to A cable. Once you have managed to boot to Reflash v1.0.0 once, you should not need to do this again.
Here is the wiki-page for Reflash v1.0.0. As of this writing, it is still not a stable release, but it should work for most people. Once booted, you have the choice of installing either Refactor v3.2.0 or Rebuild v1.0.0. The recommended choice is then going for Rebuild once that is at a stable version. There should not be any huge changes in the way things are working, most of the differences between Refactor and Rebuild is behind the scenes in the way the images are built.